

 Click it and Unblock the Notifications

Latest Updates
-
 ₹1000 Crore and Counting: ‘Dhurandhar 2’ Isn’t Just a Hit, It’s a Box Office Phenomenon
 -
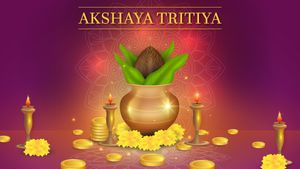 Akshaya Tritiya 2026 Date: April 19 or 20? Know The Right Day To Buy Gold This Year
 -
 From Water Fights to Egg Games: Unique Easter Monday Traditions Explained
 -
 South Indian Perfect Texture Coconut Chutney Recipe
 -
 Horoscope for Today April 06, 2026 - Practical Steps Bring Calm Progress
 -
 Chana Masala Recipe: Experience Dhaba Style Authentic Taste
 -
 Struggling With Oily Skin This Summer? Simple Tips to Keep Shine Under Control
 -
 Garlic Bread Recipe: The Cheesy Bakery Style Trick You Need
 -
 Soha Ali Khan Swears By This ‘Gentle Game-Changer’ Lemon Drink for Gut Health: Full Recipe Inside
 -
 World Health Day 2026: You’re Not As Healthy As You Think—Here’s Why


Halasana Or Plow Pose For A Glowing Skin
Halasana, also known as Plow Pose, has been taken from the Sanskrit term, in which “Hala” means the plow used in fields and “Asana” is of course pose. Now, every Sanskrit term is related to reality, and so is the case with this pose as well.

You take a shape of a plow; hence this pose is called so. Gradually, when your parts keep on expanding, you will be able to touch your toes till the ground, backwards.
A healthy and glowing skin is something that every individual dreams of and everyone wants to look their best. But, what is the solution?
Also Read: Vrksasana (Tree Pose) For Curing Low Blood Pressure
If your skin isn’t healthy, how will you look good and fresh? A good rate of metabolism is imperative for having a glowing skin.

These days, people are ready to shell out their salary on doctors for various other treatments, irrespective of the fact that you can be of good help to YOUR ownself and try achieveing your goal with the help of Yoga.
All you need is a proper guidance and perseverance to start with it. It’s just at your kick and you have to give it a go. So, why delay, right?
Once you’ll get habitual of performing yoga, even your body will get adapt with it and you’ll crave for it like food and water.
It rejuvenates your body, mind and soul. Hence, saves a lot of your hard-earned money. Have a look at the step-by-step points to perform this asana and the benefits you can reap from this asana.
Step-By-Step Procedure To Be Followed For This Asana
Step 1. Lay straight on your back with your hands on your side and your palms should be kept normally at the ground.

Step 2. Inhale. Slowly, start lifting both your legs using your abdominal muscles.
Step 3. You can take support of your hands in lifting your legs.

Step 4. Now, try lifting your feet completely, i.e., 180 degrees. Your feet should be beyond your head.
Step 5. Your back should be perpendicular to the floor.
Step 6. Just concentrate on your breathing and maintain this position for at least a minute. Then exhale and gradually get your legs down. Don’t just drop your feet. Get them down normally.

Step 7. Just repeat this pose at least 10 times or as you feel comfortable. Initially, you might not be able to touch your toes at the back. Don’t push yourself. You will become flexible day by day. So, don’t play with your body.
Make sure to perform the yoga asanas on an empty stomach, and it is ideal to usually perform these asanas in the morning.
Benefits Of This Asana
- Tones the leg muscles
- Strengthens neck, shoulder, back and leg muscles
- Calms the nervous system and thereby reduces stress and anxiety
- Improves the immune system
- Strengthens the thyroid glands
- Helps manage the menopause stage in women
Caution
Avoid this pose if you have spinal or back problem. You must always consult a yoga trainer before you start off with any kind of an exercise. Pregnant ladies should completely avoid it.
Disclaimer: The information provided in this article is for general informational and educational purposes only and is not intended as a substitute for professional medical advice, diagnosis, or treatment. Always seek the advice of your physician or a qualified healthcare provider with any questions you may have regarding a medical condition.


