

 Click it and Unblock the Notifications

Latest Updates
-
 Mughlai Style Rich Gravy Chicken Korma Recipe
 -
 Beauty Hacks 101: Office-Ready in the Morning, Party-Ready by Evening
 -
 Dhurandhar Franchise Crosses ₹3,000 Crore With Just Two Films, Sets New Record
 -
 IBS and Hydration: Why Fluid Intake Matters More Than You Think
 -
 Why That Ringing in Your Ears Gets Louder When You’re Stressed
 -
 Moong Dal Recipe: Your Light Everyday Comfort Meal
 -
 Sanya Malhotra Stuns in ₹60K Anita Dongre Benarasi Jacket Set for Toaster Promotions
 -
 Anushka Sharma Nails Effortless Chic in Black and White at RCB vs MI Match
 -
 Jallianwala Bagh Massacre Remembrance Day 2026: When Baisakhi Season 1919 Turned Into India’s Darkest Tragedy
 -
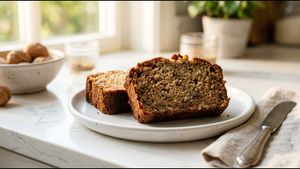 Soft Moist Bakery Style Banana Bread Recipe


Melt-in-Mouth Party Snack: Your Go-To Cheese Ball Recipe
Finding the perfect snack for your next party can be a big challenge. You want something crispy that everyone will enjoy without any fuss. This cheese ball recipe is exactly what you need for your weekend gathering. It uses simple ingredients that are usually sitting in your pantry. Your guests will love the crunch and the creamy center of every bite.
Many home cooks struggle with cheese balls that burst in the hot oil. This usually happens when the outer coating is too thin or uneven. Our secret veg method ensures a sturdy shell that stays perfectly intact. You will get a professional look every single time you cook this dish. It makes the entire process much more fun and less stressful.

There is a special trick to getting the right texture for this snack. Most people think you only need cheese and flour to make it work. However, the ratio of ingredients is the real secret to a melt-in-mouth feel. We have tested many versions to find the most reliable method for you. This recipe creates a snack that is both light and very satisfying.
Making snacks at home is a great way to control the quality of ingredients. You can choose the best cheese and the freshest herbs for your family. This cheese ball recipe is much healthier than buying frozen bags from the store. You avoid many preservatives while getting a much better flavor in return. It is a win for your health and your taste buds too.
The beauty of this dish lies in its simple yet elegant presentation. You can serve these at a fancy dinner or a casual game night. They look like they came from a high-end restaurant kitchen. Your friends will be curious about how you achieved such a perfect golden color. This recipe will make you the star of any party you host this year.
Kids especially love these snacks because they are easy to eat and very cheesy. You can even get them involved in the rolling process during the preparation. It is a fun way to teach them basic skills in the kitchen. They will feel proud to serve something they helped create for the guests. This creates great memories while making a delicious treat for everyone.
Why Everyone Is Talking About This Cheese Ball Recipe
The popularity of this specific version comes down to the unique breading technique. We use a double-coating method that locks the cheese inside the ball. This prevents any messy leaks while the snacks are frying in the pan. It creates a thick crust that stays crunchy for a long time. You will never have to worry about soggy snacks again with this guide.
Another reason people love this recipe is the balance of savory flavors. We combine sharp cheddar with mild mozzarella for the best gooey pull. The addition of fresh green chilies provides a subtle kick without being too spicy. It hits all the right notes for a perfect savory snack experience. Every bite offers a complex flavor that keeps you coming back for more.
This recipe also focuses on the temperature of the ingredients during the prep. Using cold cheese helps the balls hold their shape better during the frying stage. It is a small detail that makes a massive difference in the final result. Most other recipes skip this step and end up with flat or oily balls. Our method guarantees a perfect sphere every time you cook them.
We have also refined the spice mix to suit the modern palate. Instead of heavy spices, we use fresh herbs and a touch of black pepper. This allows the natural taste of the cheese to shine through clearly. It creates a cleaner taste that does not feel heavy on the stomach. You can enjoy several of these without feeling weighed down by grease.
Finally, the versatility of this veg cheese ball recipe is a huge selling point. You can easily adapt it to include your favorite finely chopped vegetables. This adds a nice crunch and boosts the nutritional value of the snack. It is a clever way to hide vegetables for picky eaters in the house. Everyone will be too busy enjoying the cheese to notice the extra greens.
Cheese Ball Recipe at a Glance
| Feature | Details |
|---|---|
| Prep Time | 20 Minutes |
| Cook Time | 15 Minutes |
| Total Time | 35 Minutes |
| Servings | 4 People |
| Difficulty | Easy |
| Cuisine Type | Indian |
| Meal Type | Snacks |
| Calories (approx) | 280 kcal |
Ingredients You'll Need for Cheese Ball
Before you start cooking, make sure all your ingredients are measured and ready. Using fresh ingredients will always give you the best results for your party snacks. The quality of the cheese is the most important part of this entire list. Try to use a mix of textures for the best melting properties in the center.
| Category | Ingredient | Quantity |
|---|---|---|
| Main Ingredients | Processed Cheese (grated) | 1.5 Cups |
| Main Ingredients | Boiled Potatoes (mashed) | 2 Medium |
| Main Ingredients | Breadcrumbs | 1 Cup |
| For the Spice Mix | Green Chilies (chopped) | 2 Pieces |
| For the Spice Mix | Black Pepper Powder | 0.5 Teaspoon |
| For the Spice Mix | Salt | To Taste |
| Optional Garnish | Fresh Parsley | 1 Tablespoon |
| Optional Garnish | Chili Flakes | 1 Teaspoon |
How to Make Cheese Ball Step by Step
Prep Phase
Start by preparing the base of your cheese balls with care. Clean your workspace and gather all the necessary bowls and spoons before you begin. Having everything in one place makes the process much faster and more enjoyable. Make sure your hands are clean and dry for rolling the mixture into balls.
- In a large mixing bowl, combine the grated cheese and mashed potatoes. Mix them thoroughly until the texture is smooth and even throughout the bowl.
- Add the chopped green chilies, black pepper, and salt to the cheese mixture. Fold the spices in gently so the flavors are distributed evenly in the dough.

Cooking Phase
The cooking phase requires your full attention to ensure the oil stays at the right heat. If the oil is too cold, the balls will absorb too much grease. If it is too hot, the outside will burn while the cheese stays cold. Keep the flame at a medium level for the most consistent results.
- Divide the mixture into small equal portions and roll them into smooth balls. Ensure there are no cracks on the surface to prevent the cheese from leaking.
- Dip each ball into a thin cornflour slurry and then roll it in breadcrumbs. Press the crumbs firmly so they stick well to the entire surface area.
- Heat vegetable oil in a deep pan until it reaches a medium-high temperature. Test the heat by dropping a small piece of bread into the hot oil.
- Gently slide the cheese balls into the pan in small batches of four. Do not crowd the pan as this will lower the oil temperature quickly.
Finishing Phase
The final steps are all about getting that perfect golden finish and serving hot. You want the cheese to be molten and gooey when your guests take their first bite. Serve them immediately for the best texture and flavor experience. A good dipping sauce will complete the dish perfectly.
- Fry the balls for about three minutes until they turn a deep golden brown. Turn them occasionally using a slotted spoon for an even color on all sides.
- Remove the cheese balls from the oil and place them on paper towels. Let the excess oil drain off for a minute before you plate the snacks.

Pro Tips for Veg Cheese Ball Recipe
- Most common mistake: Frying the balls when the oil is not hot enough causes sogginess. Always test the oil temperature with a small crumb before adding the balls.
- Secret technique: Freeze the rolled balls for ten minutes before breading them for better shape. This helps the cheese stay firm while you apply the outer coating.
- Storage tip: You can store the un-fried breaded balls in the freezer for up to one week. Simply fry them directly from the freezer when you have unexpected guests arrive.
- Variation suggestion: Add finely chopped bell peppers or boiled corn for extra texture and color. This makes the snack more filling and adds a nice sweet crunch.
- Serving suggestion: Serve these hot with a side of spicy garlic aioli or sweet chili sauce. The creamy dip complements the salty cheese and crunchy crust perfectly.
Make This Cheese Ball Tonight
There is no better feeling than serving a homemade snack that everyone truly loves. This cheese ball recipe is simple enough for beginners but tastes like a professional dish. You will enjoy the process of creating something so delicious from scratch in your kitchen. It is the perfect way to bring people together over great food.

Do not wait for a special occasion to try out this wonderful recipe today. Your family deserves a tasty treat that shows how much you care for them. Gather your ingredients and start rolling those perfect little balls of cheesy goodness right now. Save this recipe and share it with someone who needs it!


