

 Click it and Unblock the Notifications

Latest Updates
-
 Who Is Shilpi Raj? ‘Private Balamua’ Garners Lakhs Of Views In 5 Days, LPG Cylinder In Video Steals The Show
 -
 From 22 to CEO: How Akanksha Sharma Is Redefining Skincare With CITTA
 -
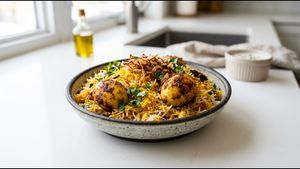 Egg Biryani Recipe: Unveiling the Dum Style Flavor Secret
 -
 No Uniform, No Award: The Story Behind Sanjeev Kapoor’s Padma Shri Moment
 -
 From Chaos to Care: Why India Needs a Golden Hour Trauma Network Before It’s Too Late
 -
 Jeetendra Birthday Special: Did You Know Bollywood’s ‘Jumping Jack’ Played Lord Rama Before Ranbir Kapoor?
 -
 World Health Day 2026: Expert Explains Why India’s Workforce Health Needs Urgent Attention Now
 -
 World Health Day 2026: Significance, History, Theme And Why Health Is A Priority, Not An Option
 -
 Dosa Batter Recipe: The Fermentation Trick You Must Know
 -
 Horoscope for Today April 07, 2026 - Small Choices, Big Progress


Avarekalu Saru Recipe: How To Make Avarekalu Saru Easily At Home

As compulsive eaters, our daily food-hunting never stops. Be it week days or weekends, we are continuously searching and trying out new dishes and still craving for more mouth-watering delicacies. Yet none of these dishes can ever replace the taste and nostalgia of "ghar-ka-khana"; the comfort and utter joy that a home-made dish instantly brings.
Therefore, for today's article, we are sharing the recipe of avarekalu saru, which is very close to our heart as a traditional recipe of Karnataka and a happy memory of childhood days. Avarekalu saru or avarekalu sagu is essentially a home-made curry, loaded with avarekai beans and other vegetables, filled with a simple yet rustic flavour along with the goodness of a creamy, lush curry.
While there are many renditions available of this same recipe, we have come up with an easy-to-prepare dish, which will be less time consuming yet will be a delicious treat for your perfect Sunday meal. So, go through the step-by-step instructions or the video guide and let us know how it turned out.

Recipe By: Kavyashree S
Recipe Type: Main course
Serves: 2
-
1. Avarekai - ½ bowl
2. Water - 1 cup
3. Tamarind juice - 1/4th cup
4. Coriander (chopped) - a handful
5. Rasam powder - 1 tbsp
6. Oil for cooking - 1+1/2 tsp
7. Coconut (grated) - ½ cup
8. Mustard seeds - ½ tbsp
9. Hing - a pinch
10. Turmeric powder - 1/2 tbsp
11. Jaggery - 1 tbsp
12. Ginger - ½ inch
13. Salt - to taste
14. Curry leaves (a handful)
-
1. Take a cooker
2. Put avarekai beans in it.
3. Add water and salt to it.
4. Close the lid.
5. Pressure cook the beans for 3-4 whistles (10-15 minutes).
6. Drain the water and pour it in a bowl.
7. Let it cool for 10-15 minutes.
8. Take a mixing jar.
9. Add coconut, rasam powder, tamarind juice, ginger, jaggery, turmeric powder and avarekai in it.
10. Add ½ a cup of water in the mixing jar.
11. Grind it all together.
12. Take a pan.
13. Add oil.
14. Add mustard seeds, hing and curry leaves one by one.
15. Add the paste and mix it well.
16. Let it simmer for 5 minutes.
17. Add salt and coriander.
18. Mix it well and transfer it into a bowl.
19. Serve hot.
- 1. If you don't like the thick texture of the curry, feel free to add more water to get the desired consistency.
- 2. Be careful with boiling the beans, as nobody likes overcooked beans.
- Serving Size - 1 bowl
- Calories - 352.5 cal
- Fat - 16.95 g
- Protein - 14.46 g
- Carbohydrates - 35.9 g
STEP BY STEP - HOW TO MAKE
1. Take a cooker

2. Put avarekai beans in it.

3. Add water and salt to it.


4. Close the lid.

5. Pressure cook the beans for 3-4 whistles (10-15 minutes).

6. Drain the water and pour it in a bowl.

7. Let it cool for 10-15 minutes.

8. Take a mixing jar.

9. Add coconut, rasam powder, tamarind juice, ginger, jaggery, turmeric powder and avarekai in it.


10. Add ½ a cup of water in the mixing jar.

11. Grind it all together.


12. Take a pan.

13. Add oil.

14. Add mustard seeds, hing and curry leaves one by one.


15. Add the paste and mix it well.


16. Let it simmer for 5 minutes.

17. Add salt and coriander.


18. Mix it well and transfer it into a bowl.


19. Serve hot.


