

 Click it and Unblock the Notifications

Latest Updates
-
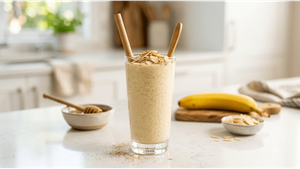 Your Quick Energy Drink: The Ultimate Banana Shake Recipe
 -
 Horoscope for Today May 20, 2026 - Calm Energy, Steady Progress for All Signs
 -
 Spicy Home Style Chicken Masala Recipe: Your New Favorite Dinner
 -
 Who Is Abhijeet Dipke? The Man Behind India's Viral Cockroach Janta Party
 -
 BC Khanduri, Former Uttarakhand CM and Army Veteran, Passes Away at 91
 -
 "Maa, Mujhe Yahan Se Lene Aa Jao": She Begged To Come Home, Nobody Came
 -
 Nachos Recipe: Your Go-To Crunchy Party Snack
 -
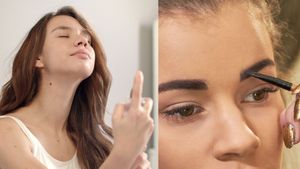 Hacks 101: How To Save Your Makeup When It Starts to Melt
 -
 Always Online, Always Exhausted: Expert Explains The Mental Wellness Cost Of Digital Work Culture
 -
 South Style Meal Vegetable Kurma Recipe: A Flavorful Delight


Step-by-Step Guide: Master The Art Of DIY Gel Manicure At Home
Giving yourself a gel manicure at home can save you time and money. Follow these steps to achieve salon-quality nails in the comfort of your own home.

How to Give Yourself a Gel Manicure at Home
Things You'll Need
Before you dive into the DIY gel manicure process, ensure you have the following materials ready:
- Gel nail polish: Choose your favourite colours from a trusted brand.
- Base coat and top coat: These provide the foundation and sealing for your gel manicure.
- LED or UV nail lamp: Essential for curing the gel polish.
- Nail file and buffer: To shape and prep your nails.
- Cuticle pusher and nippers: For cleaning and shaping cuticles.
- Nail cleanser or rubbing alcohol: To ensure nails are clean and ready for polish.
- Lint-free wipes: For wiping off residue.
- Cotton swabs: Helpful for cleaning up mistakes.
- Nail oil: To nourish your cuticles after the manicure.
Step-by-Step Guide
Step 1: Prep Your Nails
- Remove any old nail polish.
- Shape your nails using the file.
- Gently push back cuticles with the cuticle pusher.
Step 2: Buff Your Nails
- Use the buffer to gently buff the surface of your nails for better polish adherence.
- Wipe away any dust with a lint-free wipe.
Step 3: Apply Base Coat
- Apply a thin layer of the base coat and avoid getting it on your skin.
- Cure your nails under the UV or LED lamp according to the manufacturer's instructions.
Step 4: Apply Gel Polish
- Apply a thin layer of the gel polish colour of your choice.
- Cure your nails under the lamp.
- Repeat this step for a second coat if needed, curing each layer.
Step 5: Apply Top Coat
- Apply a thin layer of the top coat for a glossy finish.
- Cure your nails one last time under the lamp.
Step 6: Finishing Touches
- Remove the sticky residue with a lint-free wipe soaked in rubbing alcohol.
- Apply nail oil to your cuticles for hydration.
Tips for Long-Lasting Results
- Avoid getting polish on your skin to prevent lifting.
- Seal the edges of your nails with each layer to prevent chipping.
- Apply thin layers for better curing and longer-lasting manicure.
- Don't skip the curing step as it's crucial for setting the gel polish.
Aand you are good to go!
Comments
Article Published On: Saturday, August 19, 2023, 19:15 [IST]