

 Click it and Unblock the Notifications

Latest Updates
-
 Eid al-Adha 2026: Date, Moon Sighting, Significance, and the Story Behind the Festival
 -
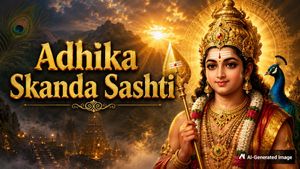 Skanda Sashti May 2026: Fasting Benefits, Puja Vidhi, and Murugan Mantra
 -
 Hyderabadi Style Chicken Masala Recipe: A Flavorful Lunch Delight
 -
 From Bigg Boss To Desi Bling — Karan And Tejasswi's Love Story Just Hit Its Biggest Moment
 -
 Piles In Summer: Here's Why It Happens And What You Can Do About It
 -
 Healthy 5 Minute Breakfast: Creamy Avocado Banana Smoothie Recipe
 -
 Heatwave Alert: Why Your Phone and Laptop Are Overheating Right Now
 -
 National Anti-Terrorism Day 2026: How Rajiv Gandhi’s Assassination Sparked A Nationwide Call For Peace
 -
 International Tea Day 2026: Here's What Drinking Tea First Thing In The Morning Does To Your Gut
 -
 Horoscope for Today May 21, 2026 - Curiosity Rises, Plans Shift


Sleek Straight Hairstyle Is In: Here’s How You Can Get It At Home!
Tbh, sleek straight hairstyles were never out. Recently, we have seen a sudden surge in it, with all your favourite celebs flaunting it - from Kiara to Kriti to Kendall and Bella; all the girls are doing the sleek straight hair now.
So, why shouldn't you, too, right? Easily one of the most fuss-free yet classy hairstyles, the sleek straight hairstyle is something everyone with long hair should definitely try.
And we will help you with it. How you may think - well, b giving you guys an easy step-by-step guide to getting sleek straight hairstyle at home. So, for the next event, you can be the IT GIRL!

Embrace that glam, queen.
How To Get Sleek Straight Hairstyle At Home
Follow the steps below:
Step 1: The first step is to shampoo and condition your hair.
Step 2: Dry your hair thoroughly with a towel until it is barely damp; this will reduce the amount of time it takes to dry.
Step 3: Apply a serum to the damp hair.
Step 4: Blow dry hair completely dry.
Step 5: Divide your hair into two sections from front to nape, then sharpen your parting with a tail comb.
Step 6: Apply a heat protect spray evenly from roots to ends of diagonal subsections beginning at the nape.

Step 7: Using your thumb, pull straight with the subsection at 90 degrees from the head, placing a bristle brush at the roots.
Step 8: Place your straightener behind the brush at the root. Then, maintaining a 90-degree angle, gently run the straightener from roots to ends, following the brush.
Step 9: To add extra shape and lift to the crown, shape the roots at the top by rotating the bottom plate back and forth.
Step 10: As a final step, use an oval hairbrush (to create sleekness) to brush from the root to the tip, setting the style and adding shine.
And you are good to go!